

Connect ChatGPT

Kalender Sync is listed in ChatGPT’s plugin directory. You open the plugin, add it and confirm the grant with us — that’s all. Codex uses the same directory.
Step by step
Section titled “Step by step”- Open Kalender Sync in the plugin directory (or search for “Kalender Sync” under Plugins in ChatGPT) and add the plugin.
- ChatGPT sends you to our sign-in. If you don’t have an account yet, you create it right there (7 days free, no credit card) and connect your calendars.
- Confirm the grant on the consent screen — pick the calendars, set the detail level per calendar. Only now does the access exist.
For a new assistant connection, only each account’s provider-designated primary calendar is preselected, within your plan limit. You can select additional calendars. If the provider does not identify a primary calendar, you choose it yourself. Selected calendars start with the maximum supported permissions; the sliders icon next to the access label opens the detail level, write and management permissions for that calendar. Use Share to confirm your selection. If a plan offer appears, you can skip it directly. Access is then granted; the success screen shows example prompts and an app link. It returns you to the assistant after eight seconds, or immediately via the return button. Reconnecting preserves existing permissions where they remain available.
Afterwards you can ask about your availability in a chat (“Am I free tomorrow at 2pm?”) or have it find events (“When is my dentist appointment?”).
Alternative: via Developer mode
Section titled “Alternative: via Developer mode”If the plugin directory isn’t available on your account, you add Kalender Sync as a custom connector.
The address (MCP server URL) you’ll enter is:
https://app.kalender-sync.de/mcpVideo: connecting ChatGPT
Section titled “Video: connecting ChatGPT”The video shows this route and starts right at the ChatGPT chapter of the tutorial:

Clicking play loads YouTube. Data will be sent to Google.
1. Enable Developer mode
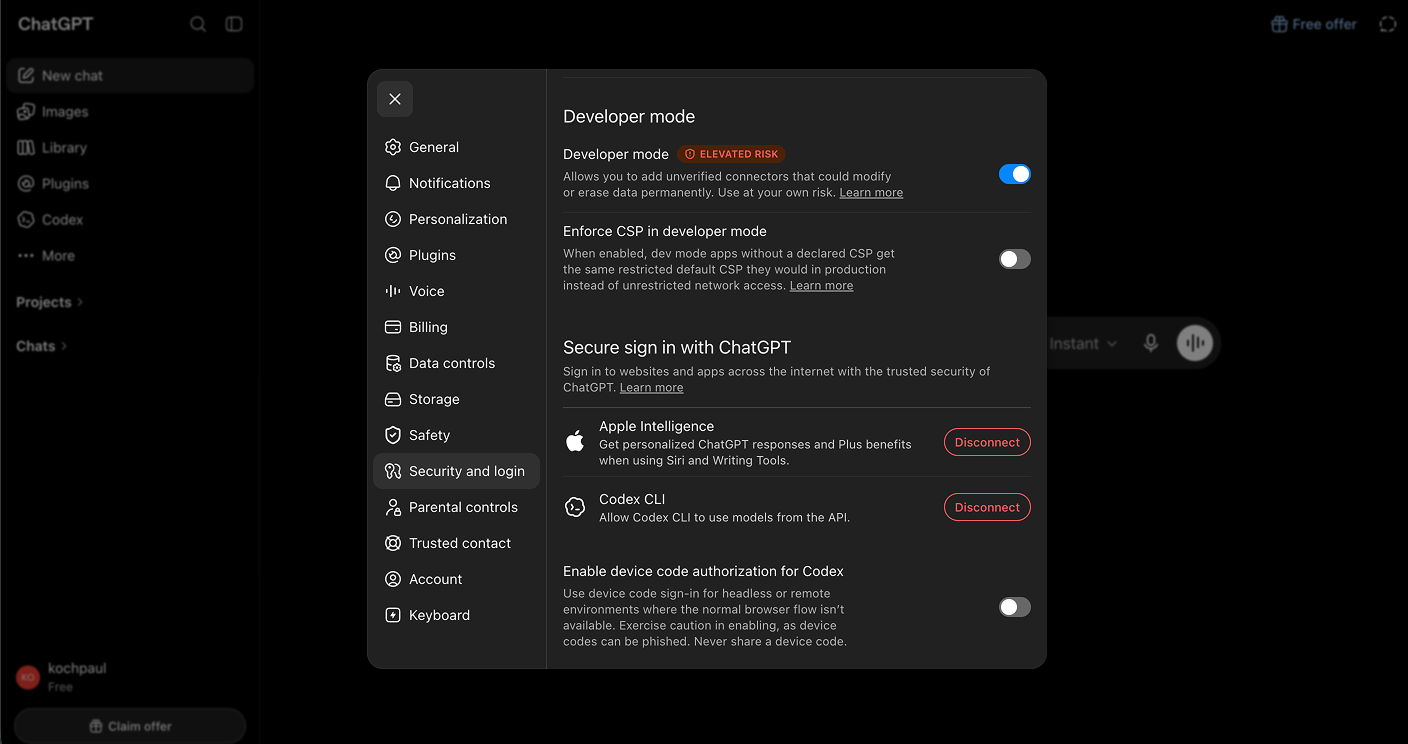
Section titled “1. Enable Developer mode”In ChatGPT open Settings → Connectors, then Advanced and Developer mode.
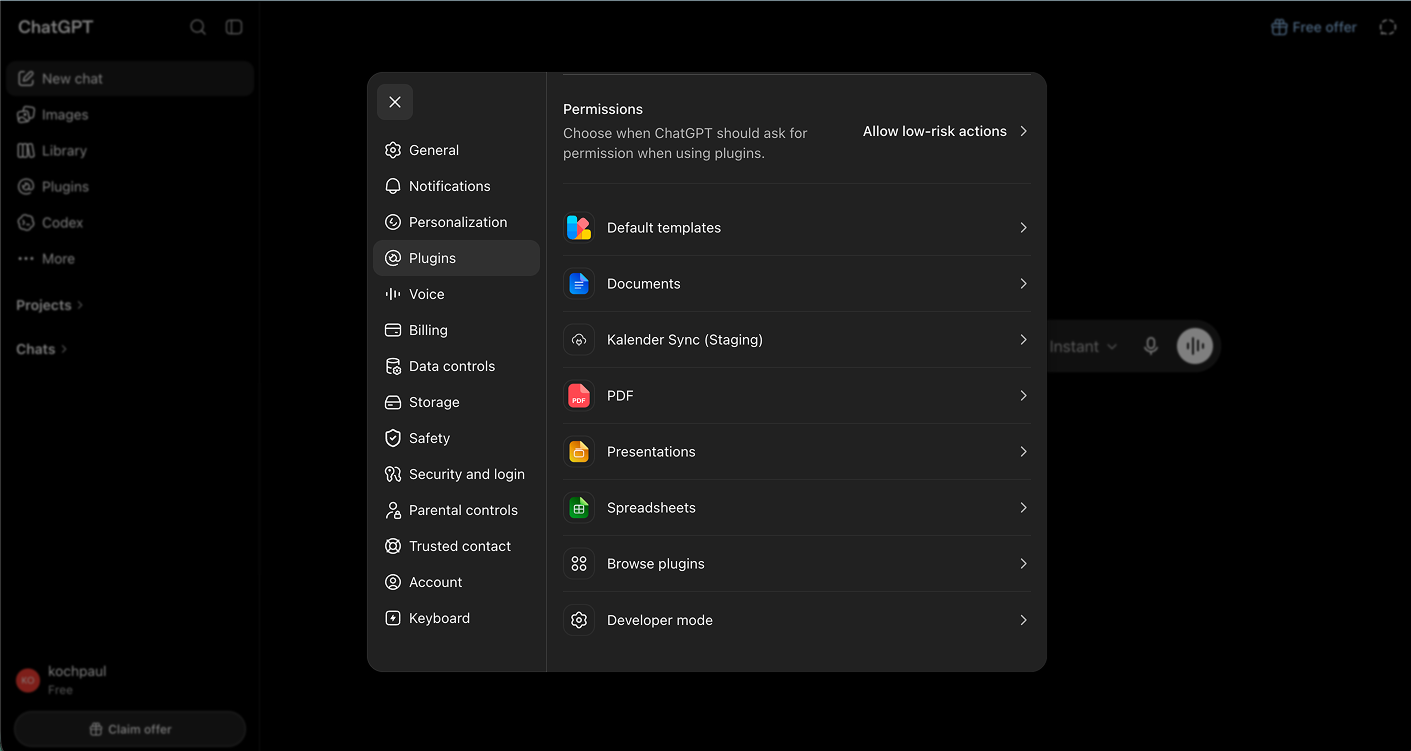
Turn Developer mode on and accept the risk notice.
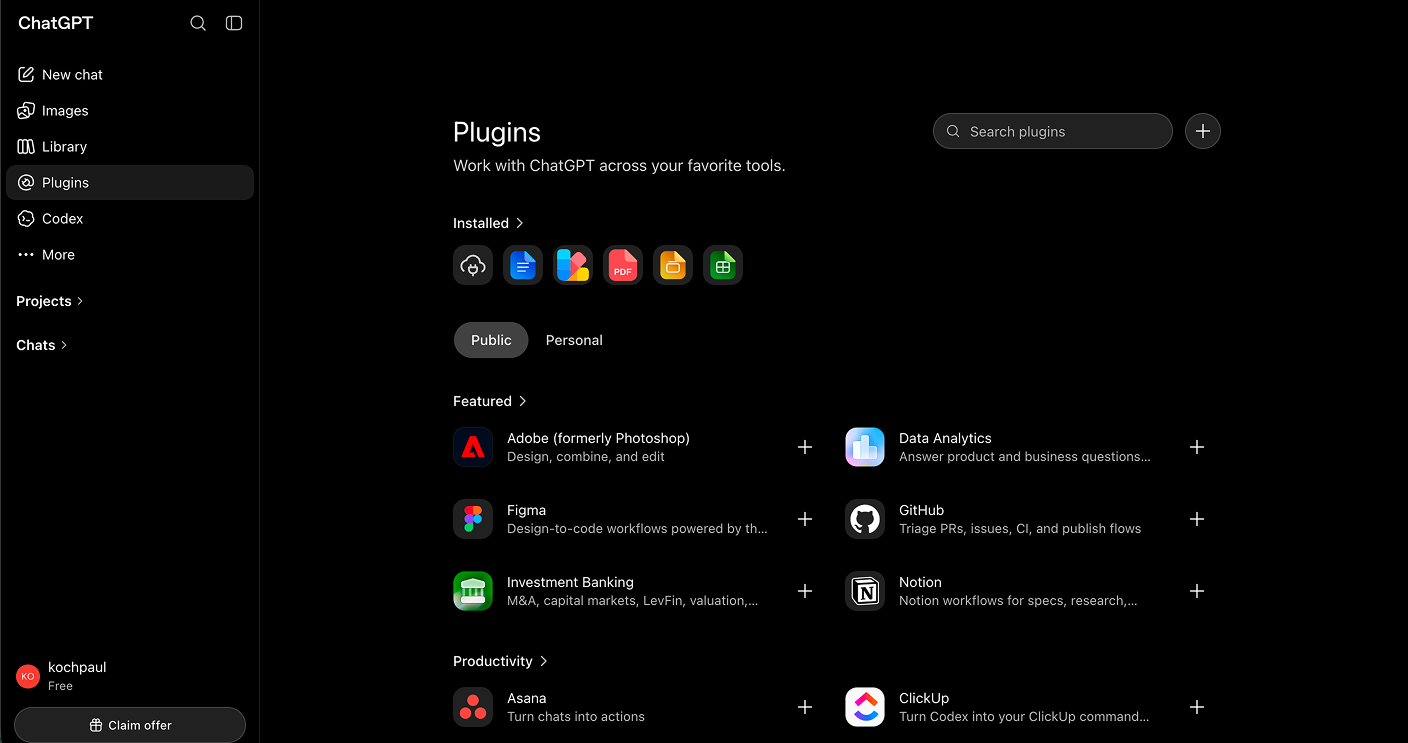
2. Add the connector
Section titled “2. Add the connector”Go to the Connectors page and click + at the top right.
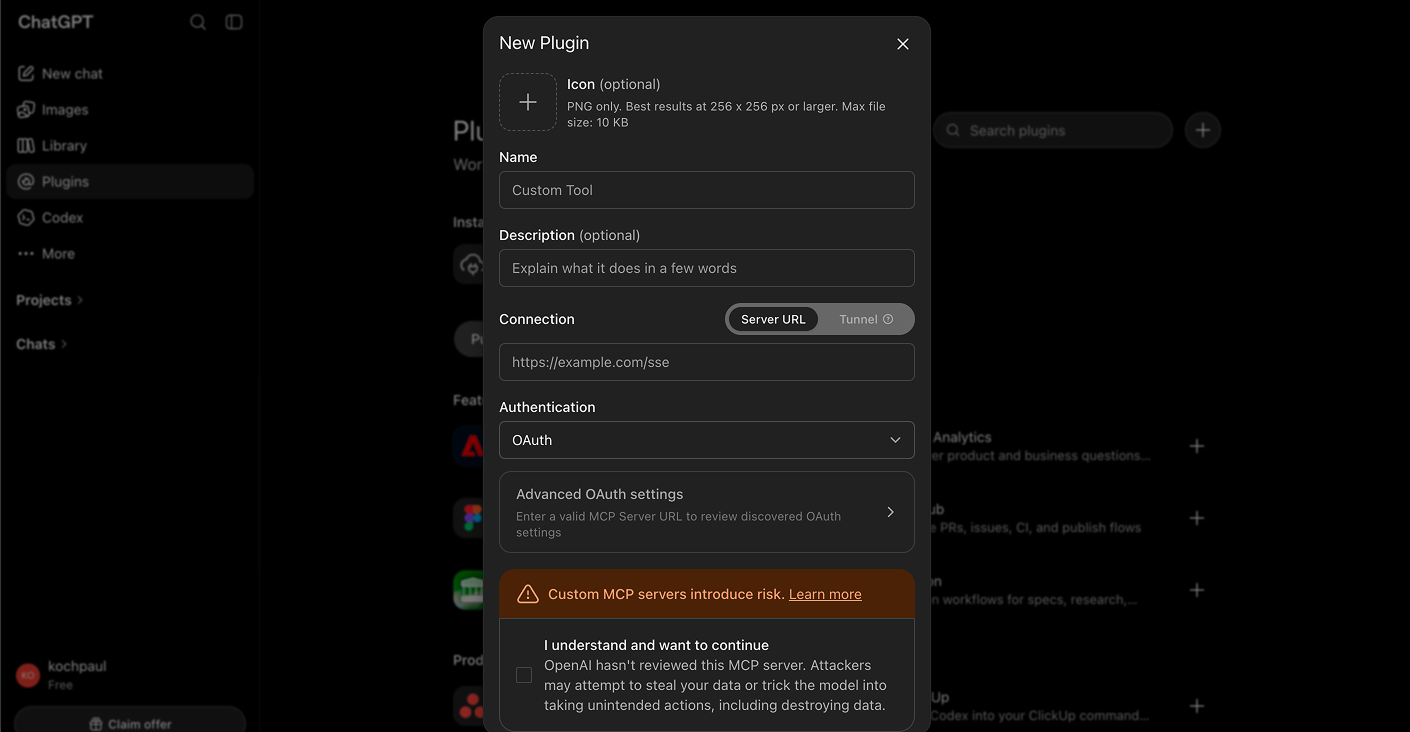
In the “New connector” dialog:
- Name: e.g.
Kalender Sync - Connection: leave
Server URLselected, enter the address copied above - Authentication:
OAuth - Accept the risk notice and add it.
3. Grant access
Section titled “3. Grant access”ChatGPT sends you to our consent screen. Sign in, pick the calendars and the detail level per calendar — only with this confirmation does the access exist.
Afterwards you can ask about your availability in a chat (“Am I free tomorrow at 2pm?”) or have it find events (“When is my dentist appointment?”).
Disconnect again
Section titled “Disconnect again”Removing the connector in ChatGPT only disconnects it there. The authoritative revoke is the one in Kalender Sync under AI assistant → Revoke → Revoke access.